De l’installation jusqu’à la mesure à l’échelle. Ce manuel suit la disposition du programme : d’abord la fenêtre, puis le rôle de chaque onglet du ruban.
Open PDF Studio fonctionne sous Windows, macOS, Linux et Android. Toutes les versions se trouvent sur la page de téléchargement ; aucun compte ni clé de licence n’est nécessaire.
Windows
Il existe deux programmes d’installation. L’installation utilisateur (*_x64_user-setup.exe) installe uniquement pour votre compte et ne demande pas de droits d’administrateur — pratique sur un ordinateur portable professionnel géré. L’installation système (*_x64-setup.exe) installe pour tous les utilisateurs et demande, elle, des droits d’administrateur.
Linux
Choisissez le paquet .deb pour Debian et Ubuntu, le .AppImage si vous préférez ne rien installer, ou la version du Snap Store. L’impression nécessite les outils client CUPS (lp et lpstat) ; les versions Snap et Flatpak incluent déjà cet accès.
macOS
Le .dmg fonctionne sur les Mac Intel comme sur les Mac Apple Silicon.
Mises à jourLe programme vérifie s’il existe de nouvelles versions et se met à jour tout seul. Pour revenir à la version précédente, utilisez Version précédente dans l’onglet Accueil.
2. La fenêtre
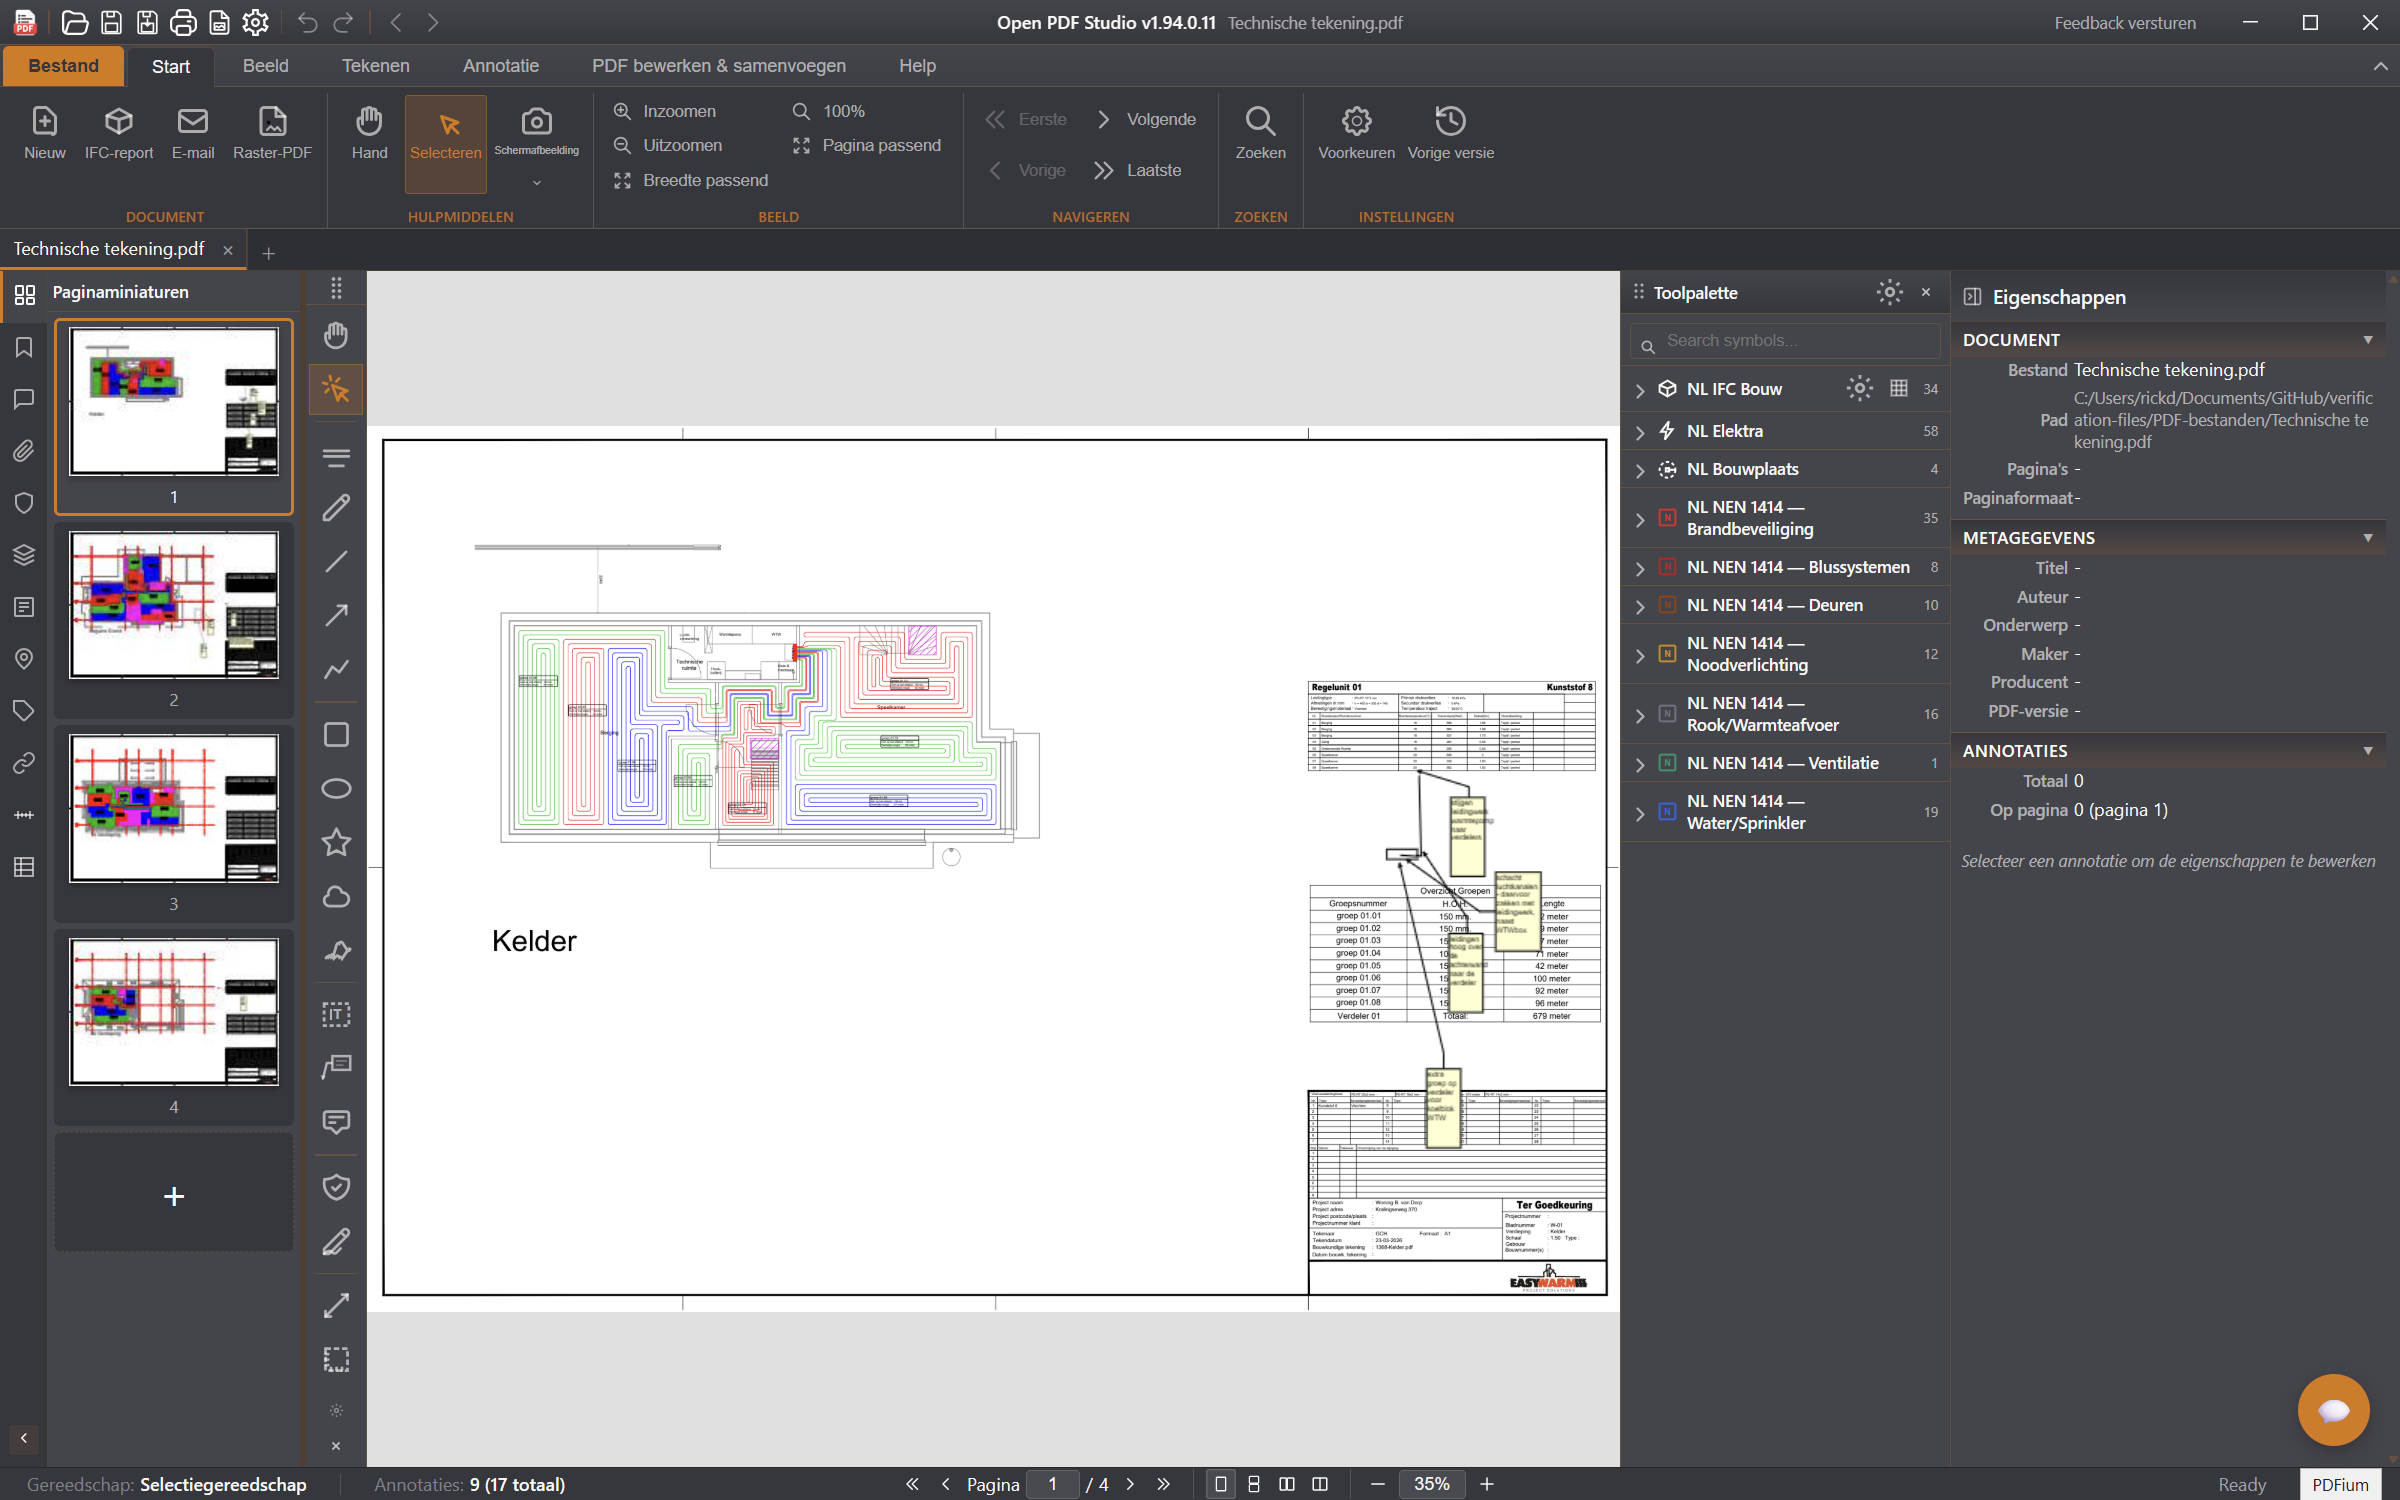
La fenêtre comporte cinq parties. Une fois que vous les reconnaissez, vous trouvez tout.
Le ruban en haut, avec les onglets Fichier, Accueil, Affichage, Dessin, Commentaire, Modifier & fusionner PDF et Aide. Sélectionnez une annotation et les onglets supplémentaires Format et Organiser apparaissent.
Les onglets de document juste en dessous : chaque PDF ouvert a son propre onglet.
Le panneau de navigation à gauche, avec les miniatures des pages, les signets, les commentaires, les pièces jointes, les calques, les champs de formulaire et les liens. Affichez-le ou masquez-le avec F9.
Le canevas au centre, où le PDF est affiché.
Le panneau des propriétés à droite, qui affiche tous les réglages de l’objet sélectionné. Affichez-le ou masquez-le avec F12.
La barre d’état en bas indique l’outil actif, le nombre d’annotations, le numéro de page et le niveau de zoom.
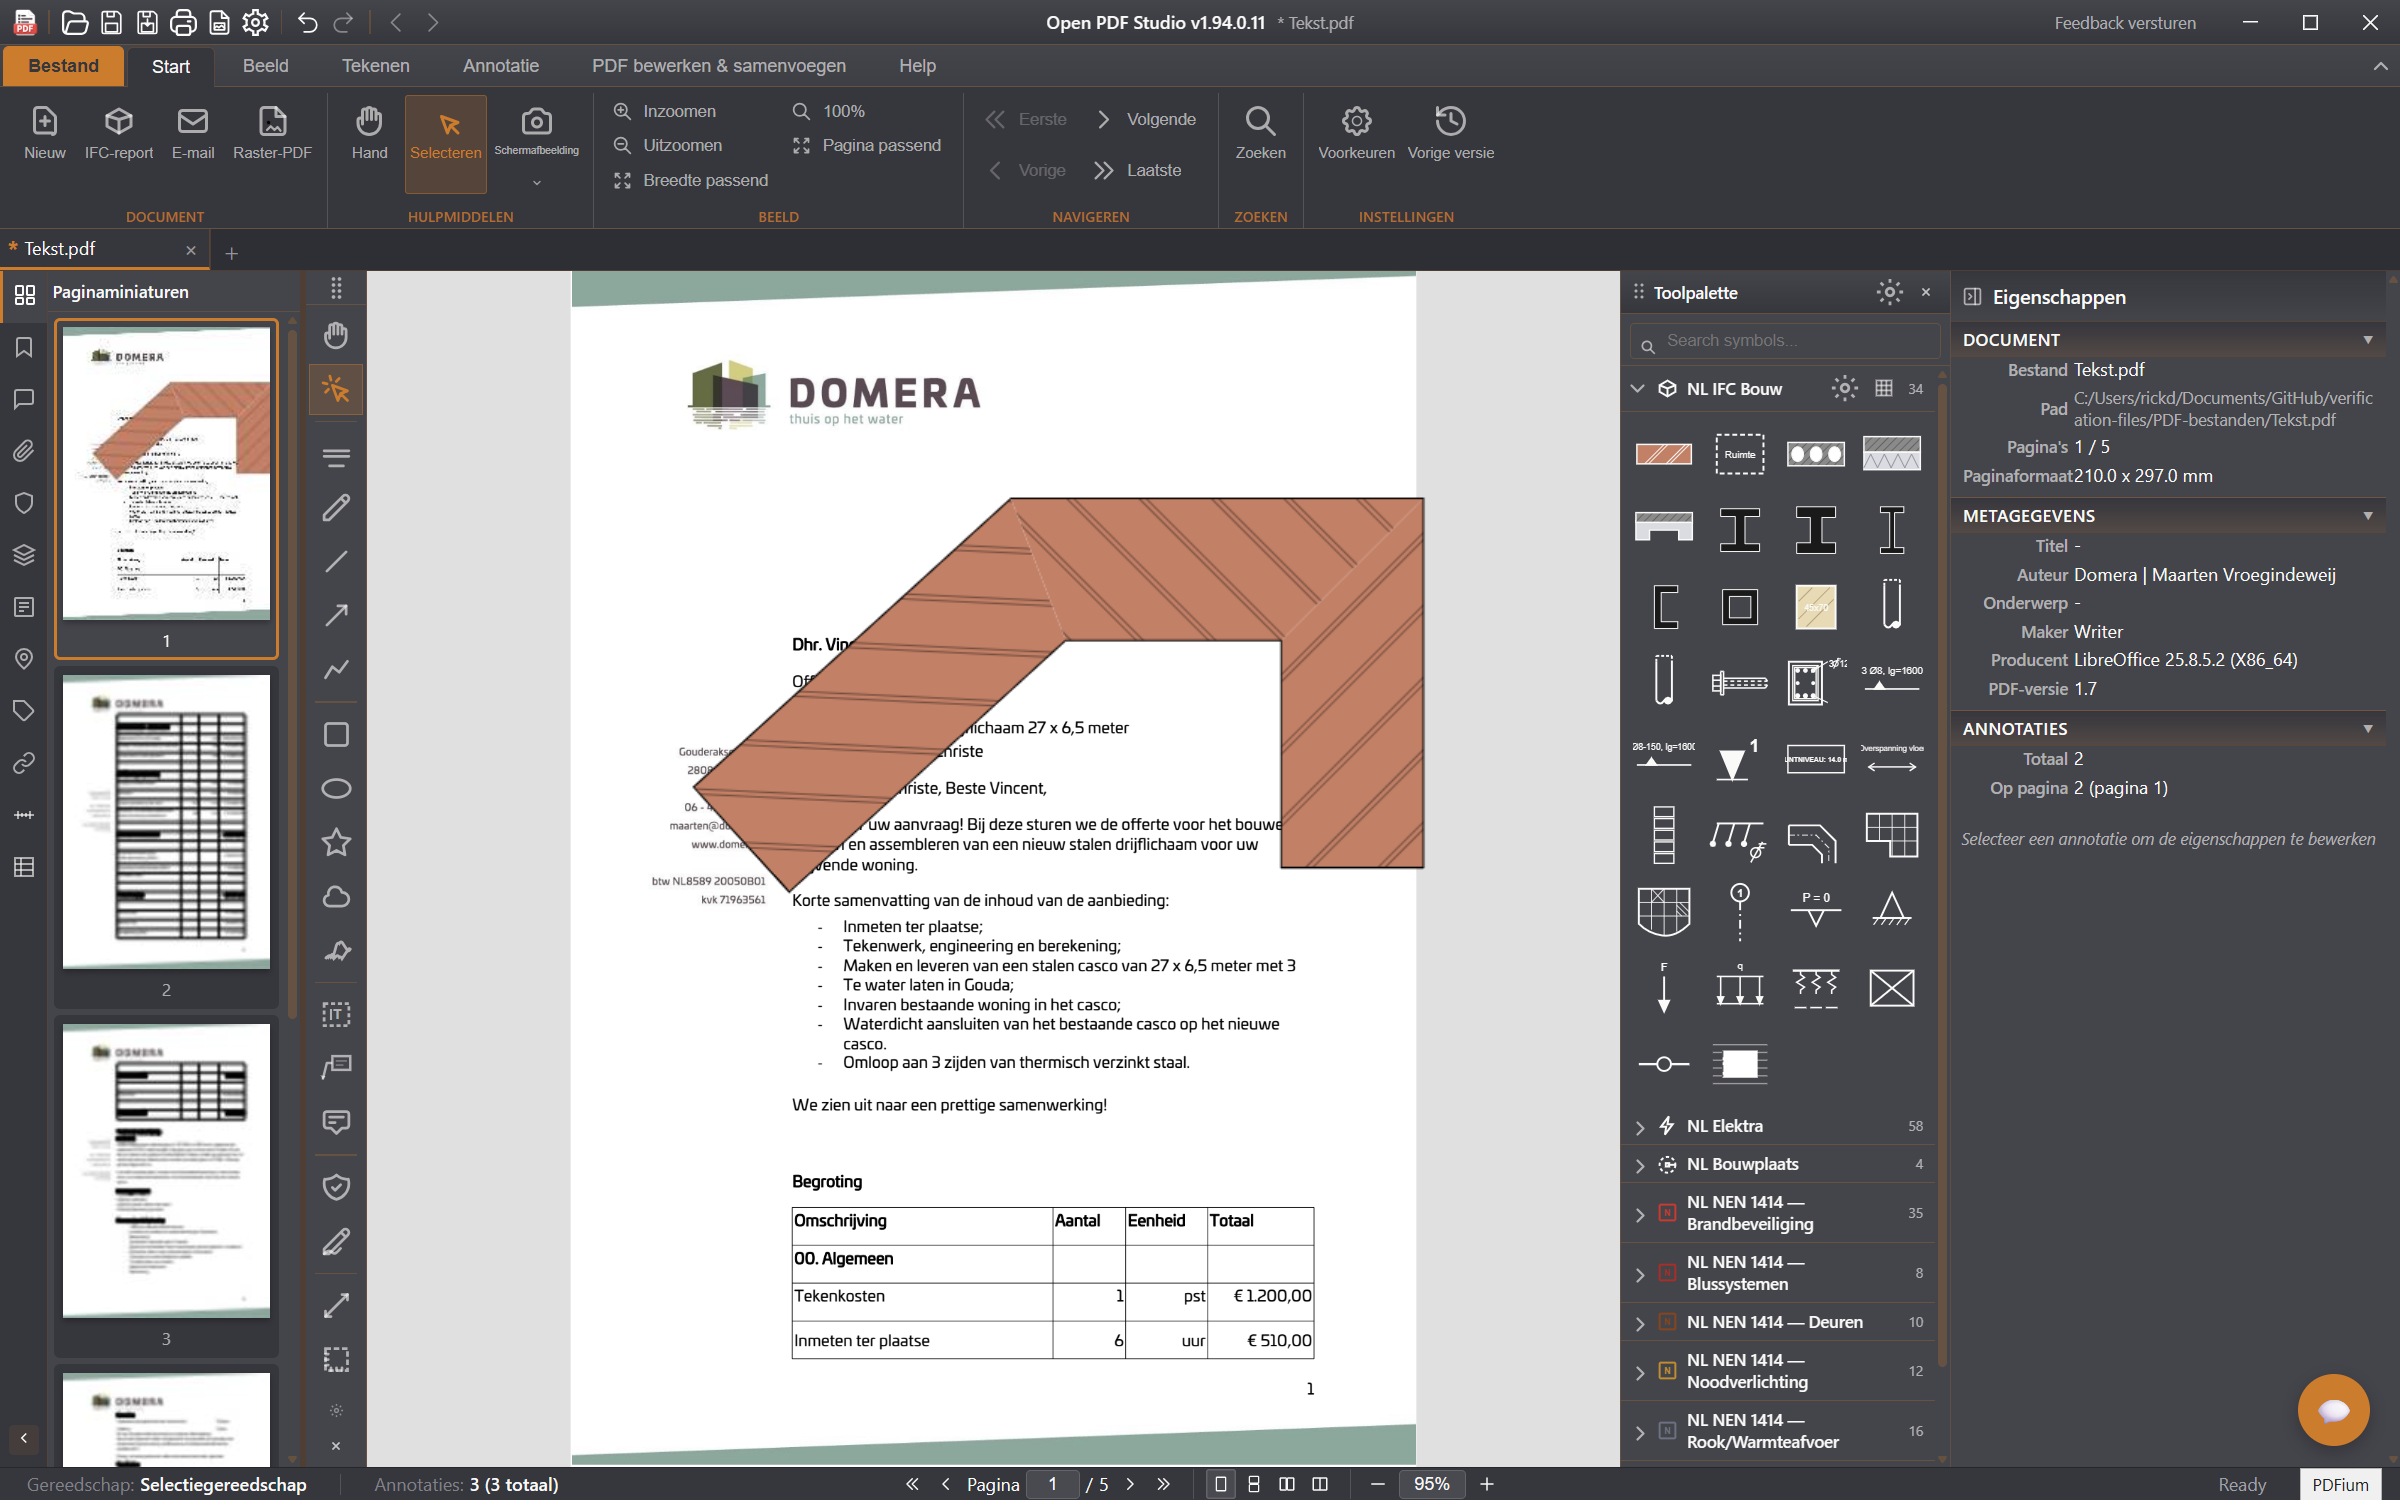
La fenêtre : le panneau de navigation à gauche, le plan au centre, le panneau des propriétés à droite et la barre d’état en bas.
3. Ouvrir et naviguer
Ouvrez un PDF avec Fichier → Ouvrir (Ctrl+O) ou en déposant le fichier sur la fenêtre. Vous pouvez en ouvrir plusieurs à la fois ; chacun a son propre onglet.
Zoomer et ajuster
Zoomez avec Ctrl++ et Ctrl+−, ou maintenez Ctrl enfoncée et tournez la molette de la souris — la vue zoome alors vers le pointeur. Ctrl+0 affiche la taille réelle, Ctrl+1 ajuste à la largeur et Ctrl+2 à la page entière.
Affichage des pages
Dans l’onglet Affichage, vous choisissez entre page unique, défilement continu, vue livre et deux pages côte à côte. Les nouveaux documents s’ouvrent en page unique.
Rechercher
Ctrl+F recherche dans le texte du document et met en surbrillance les résultats sur la page.
4. Annoter
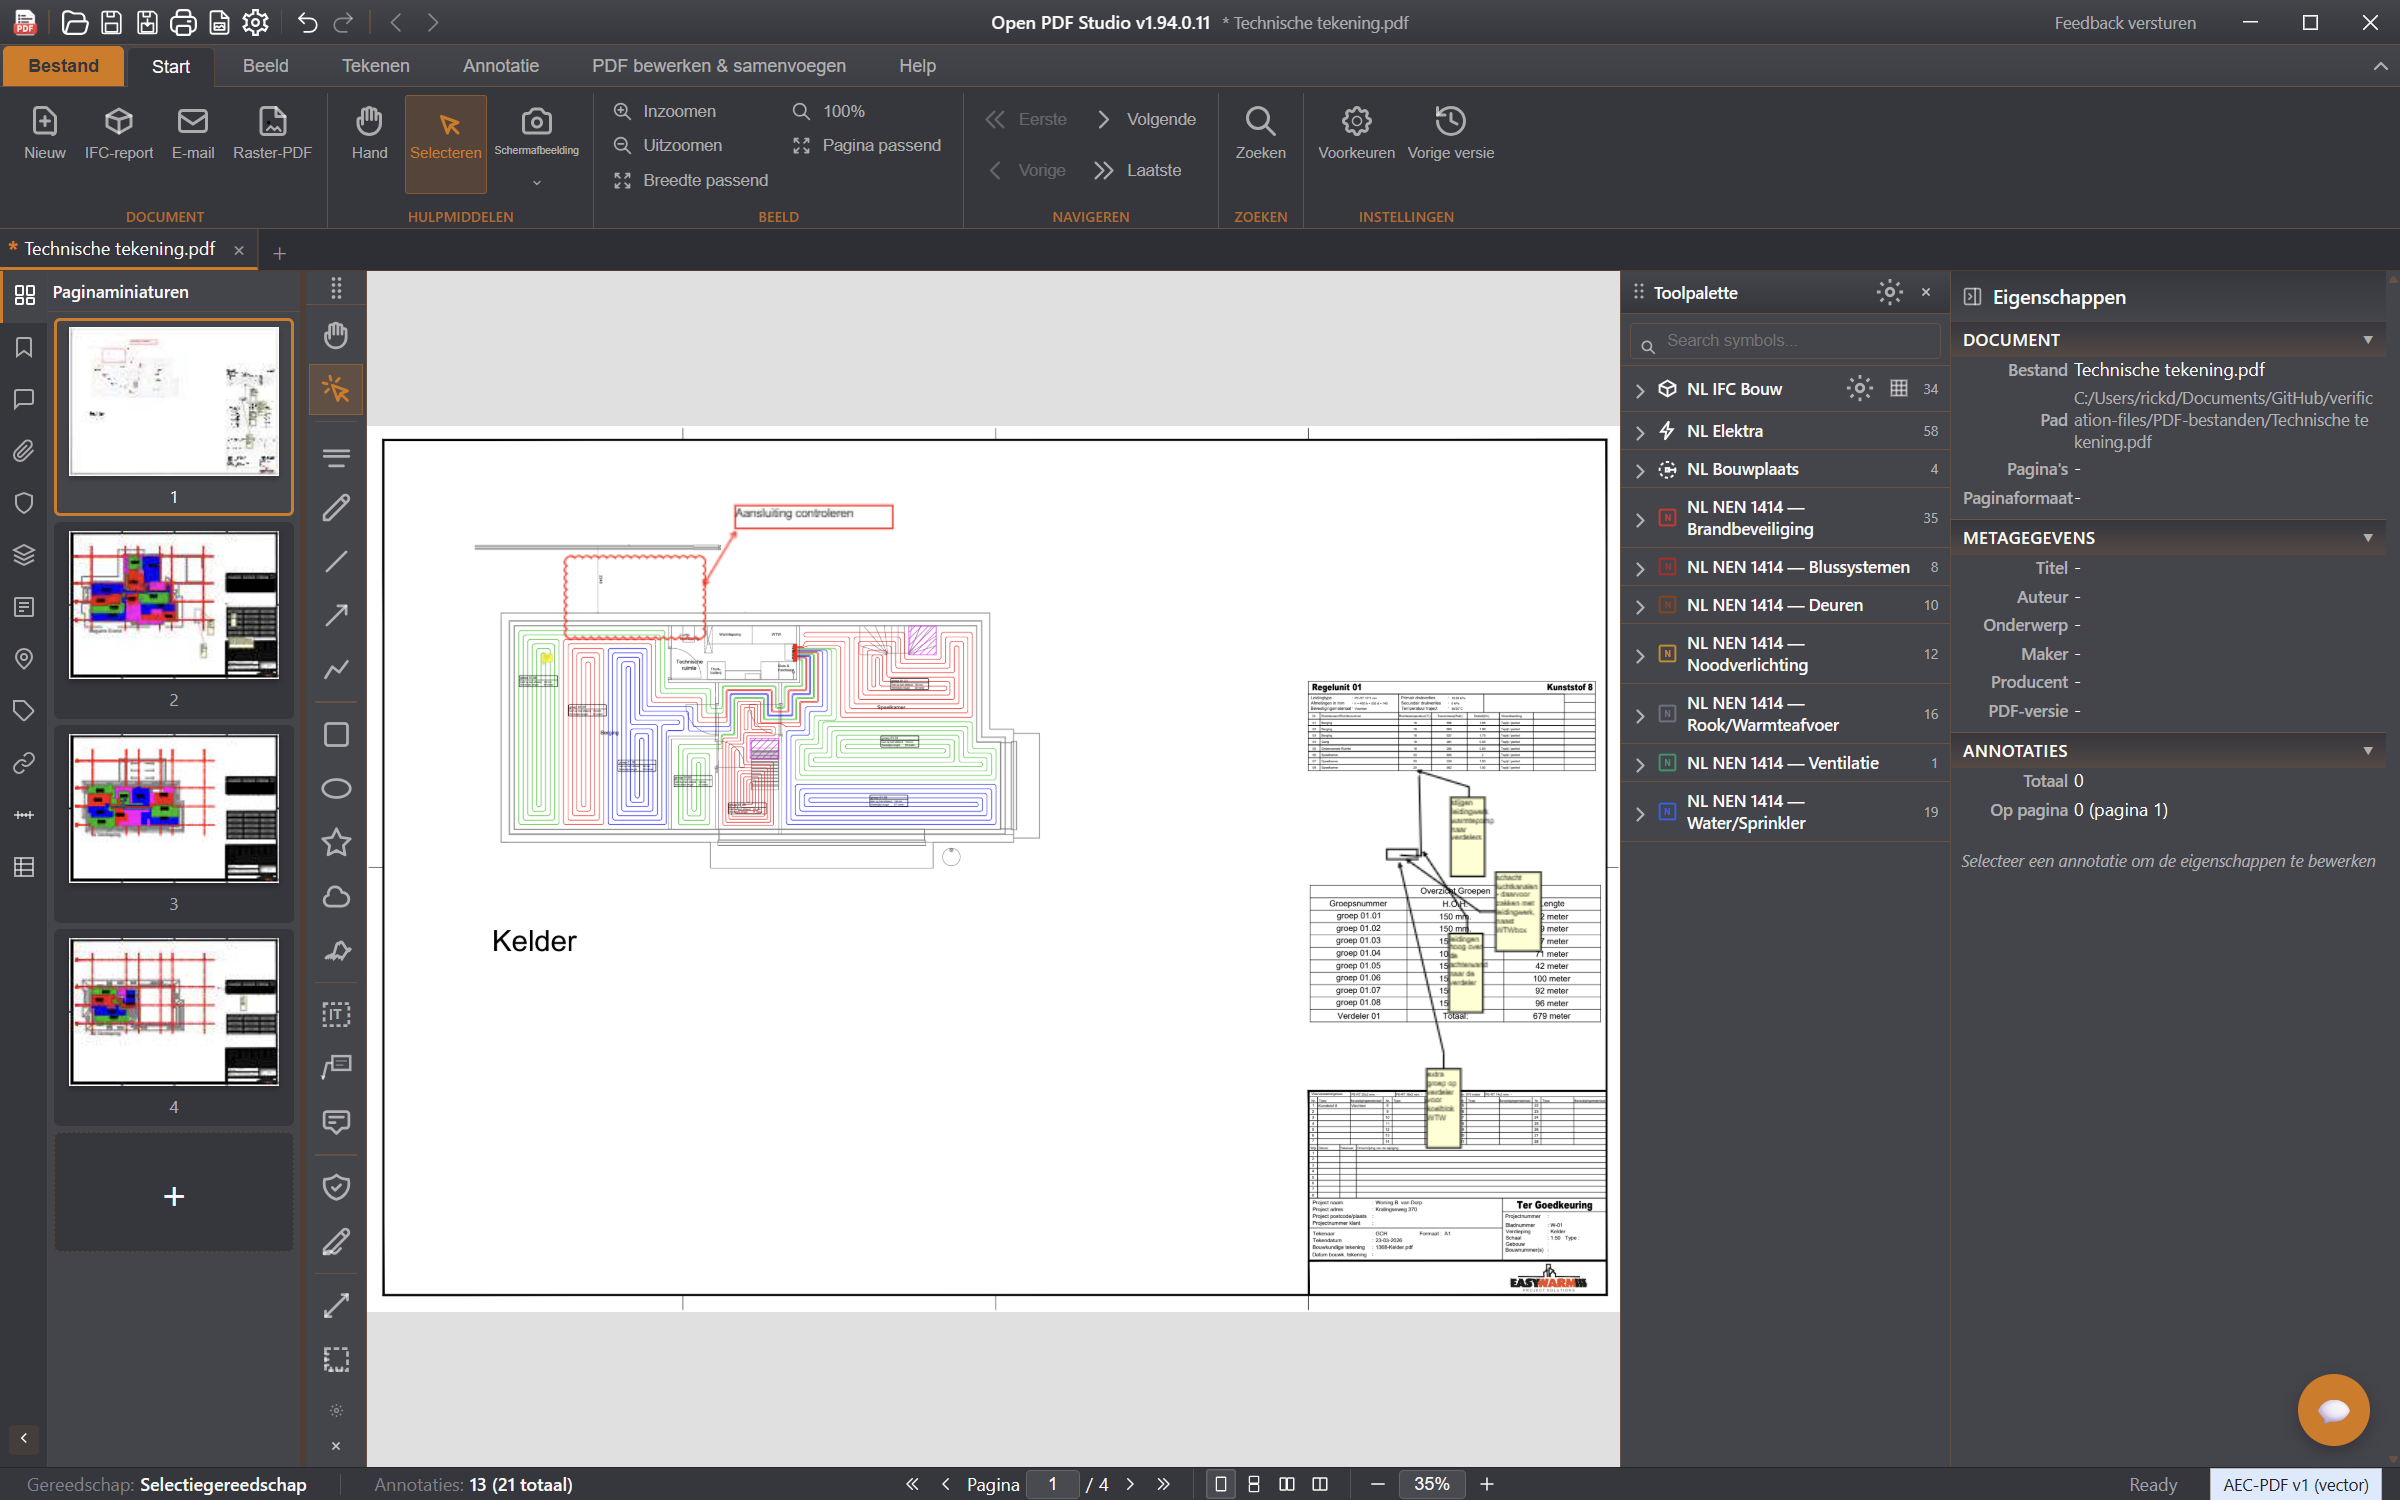
Les outils d’annotation se trouvent dans l’onglet Commentaire. Choisissez un outil, dessinez sur la page, puis ajustez les propriétés à droite — couleur, épaisseur de trait, opacité et taille de police.
Un nuage de révision, une flèche et une zone de texte sur un plan d’installations techniques — tout reste modifiable par la suite.
Baliser du texte
Surligner, souligner, barrer et souligner en vague agissent sur le vrai texte du PDF : sélectionnez le texte et cliquez sur l’outil.
Formes et lignes
Rectangle, ellipse, polygone, nuage, ligne, flèche, polyligne, spline et flèche courbe. Terminez une polyligne, une spline ou une zone remplie par un double-clic (ou par le bouton droit de la souris pour une zone remplie).
Notes, zones de texte et tampons
Une note adhésive (N) place un commentaire qui s’ouvre d’un clic. Une zone de texte (T) place du texte directement sur le plan. Les tampons comprennent Approuvé, Rejeté, Brouillon et Confidentiel ; dessinez une signature une fois et réutilisez-la.
Sélectionner et modifier
Avec l’outil de sélection (V), vous cliquez sur une annotation ; tracez un cadre de sélection pour en prendre plusieurs à la fois. Les poignées redimensionnent, la poignée ronde au-dessus fait pivoter. Delete supprime la sélection, Ctrl+Z annule.
Tous les commentaires dans une listeLa liste des annotations (F11) affiche toutes les annotations du document. Cliquez sur une ligne pour y accéder ; de là, vous pouvez aussi les exporter en XFDF pour les échanger avec un collègue.
5. Dessiner
L’onglet Dessin sert à dessiner sur le plan lui-même : main levée, hachures, zones remplies et la palette d’outils avec ses symboles.
Accrochage aux objets
Pendant le dessin, le pointeur s’accroche aux extrémités, aux milieux, aux intersections et aux centres de ce qui existe déjà. Les raccordements sont ainsi précis sans avoir à zoomer.
Dessin continu
Les murs et les poutres se dessinent en continu : après chaque clic, le segment suivant part du point précédent. Terminez la série avec Esc ou le bouton droit de la souris.
Gomme
La gomme efface les traits à main levée ; les autres annotations se suppriment avec Delete.
6. Mesure et échelle
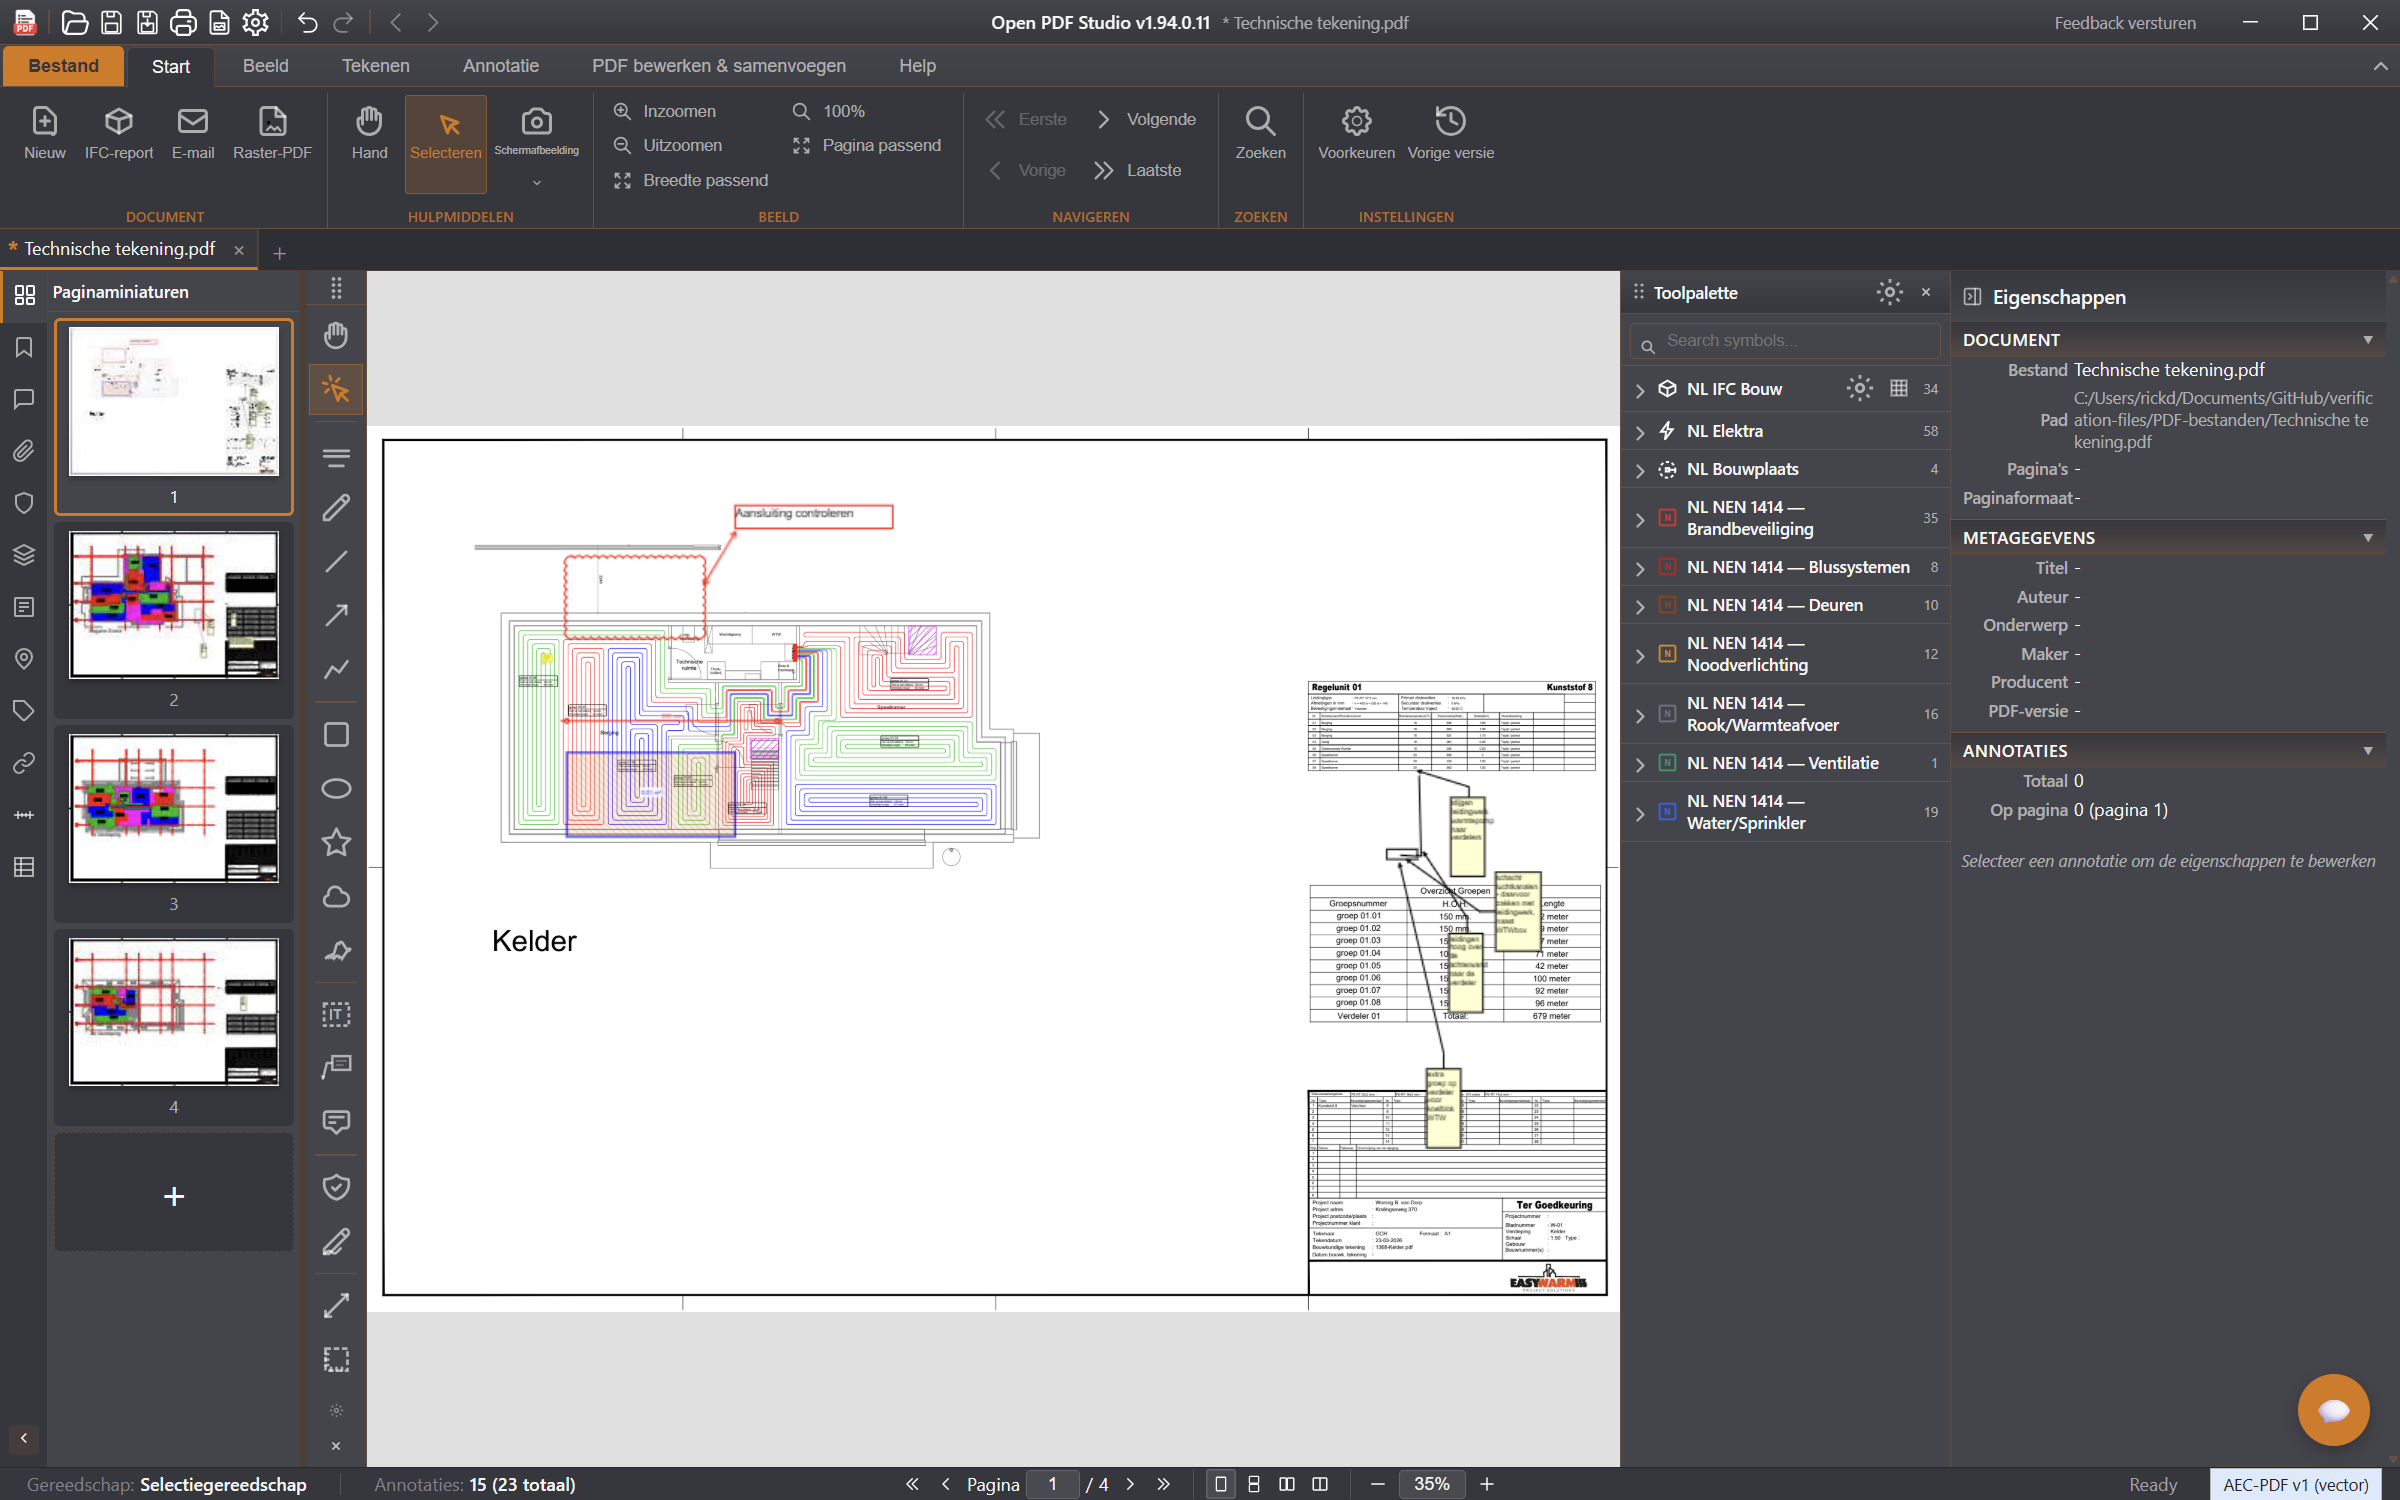
Toute mesure commence par l’échelle. Sans elle, le programme mesure en points au lieu de millimètres ou de mètres.
Une fois l’échelle définie, une ligne de cote et une mesure de surface donnent immédiatement des valeurs réelles.
Définir l’échelle
Allez dans l’onglet Mesure et choisissez Définir l’échelle.
Cliquez sur deux points dont vous connaissez la distance réelle — une ligne de cote du plan, par exemple.
Saisissez cette longueur réelle et confirmez. L’échelle active s’affiche alors dans le ruban.
Zones d’échelle
Si une feuille comporte plusieurs échelles — par exemple un plan d’étage au 1:100 avec un détail au 1:20 — tracez une zone d’échelle autour du détail et donnez-lui sa propre échelle. Tout ce que vous mesurez ou dessinez dans cette zone utilise automatiquement cette échelle.
Mesurer
Mesurez une distance, une surface, un périmètre ou un angle. Une ligne de cote se trace en trois clics : début, fin et emplacement du texte. Pour la surface et le périmètre, vous cliquez sur le contour et terminez par un double-clic.
Métrés
Toutes les mesures sont rassemblées dans le tableau des métrés, que vous pouvez exporter pour une estimation des coûts ou un devis quantitatif.
7. Symboles de construction
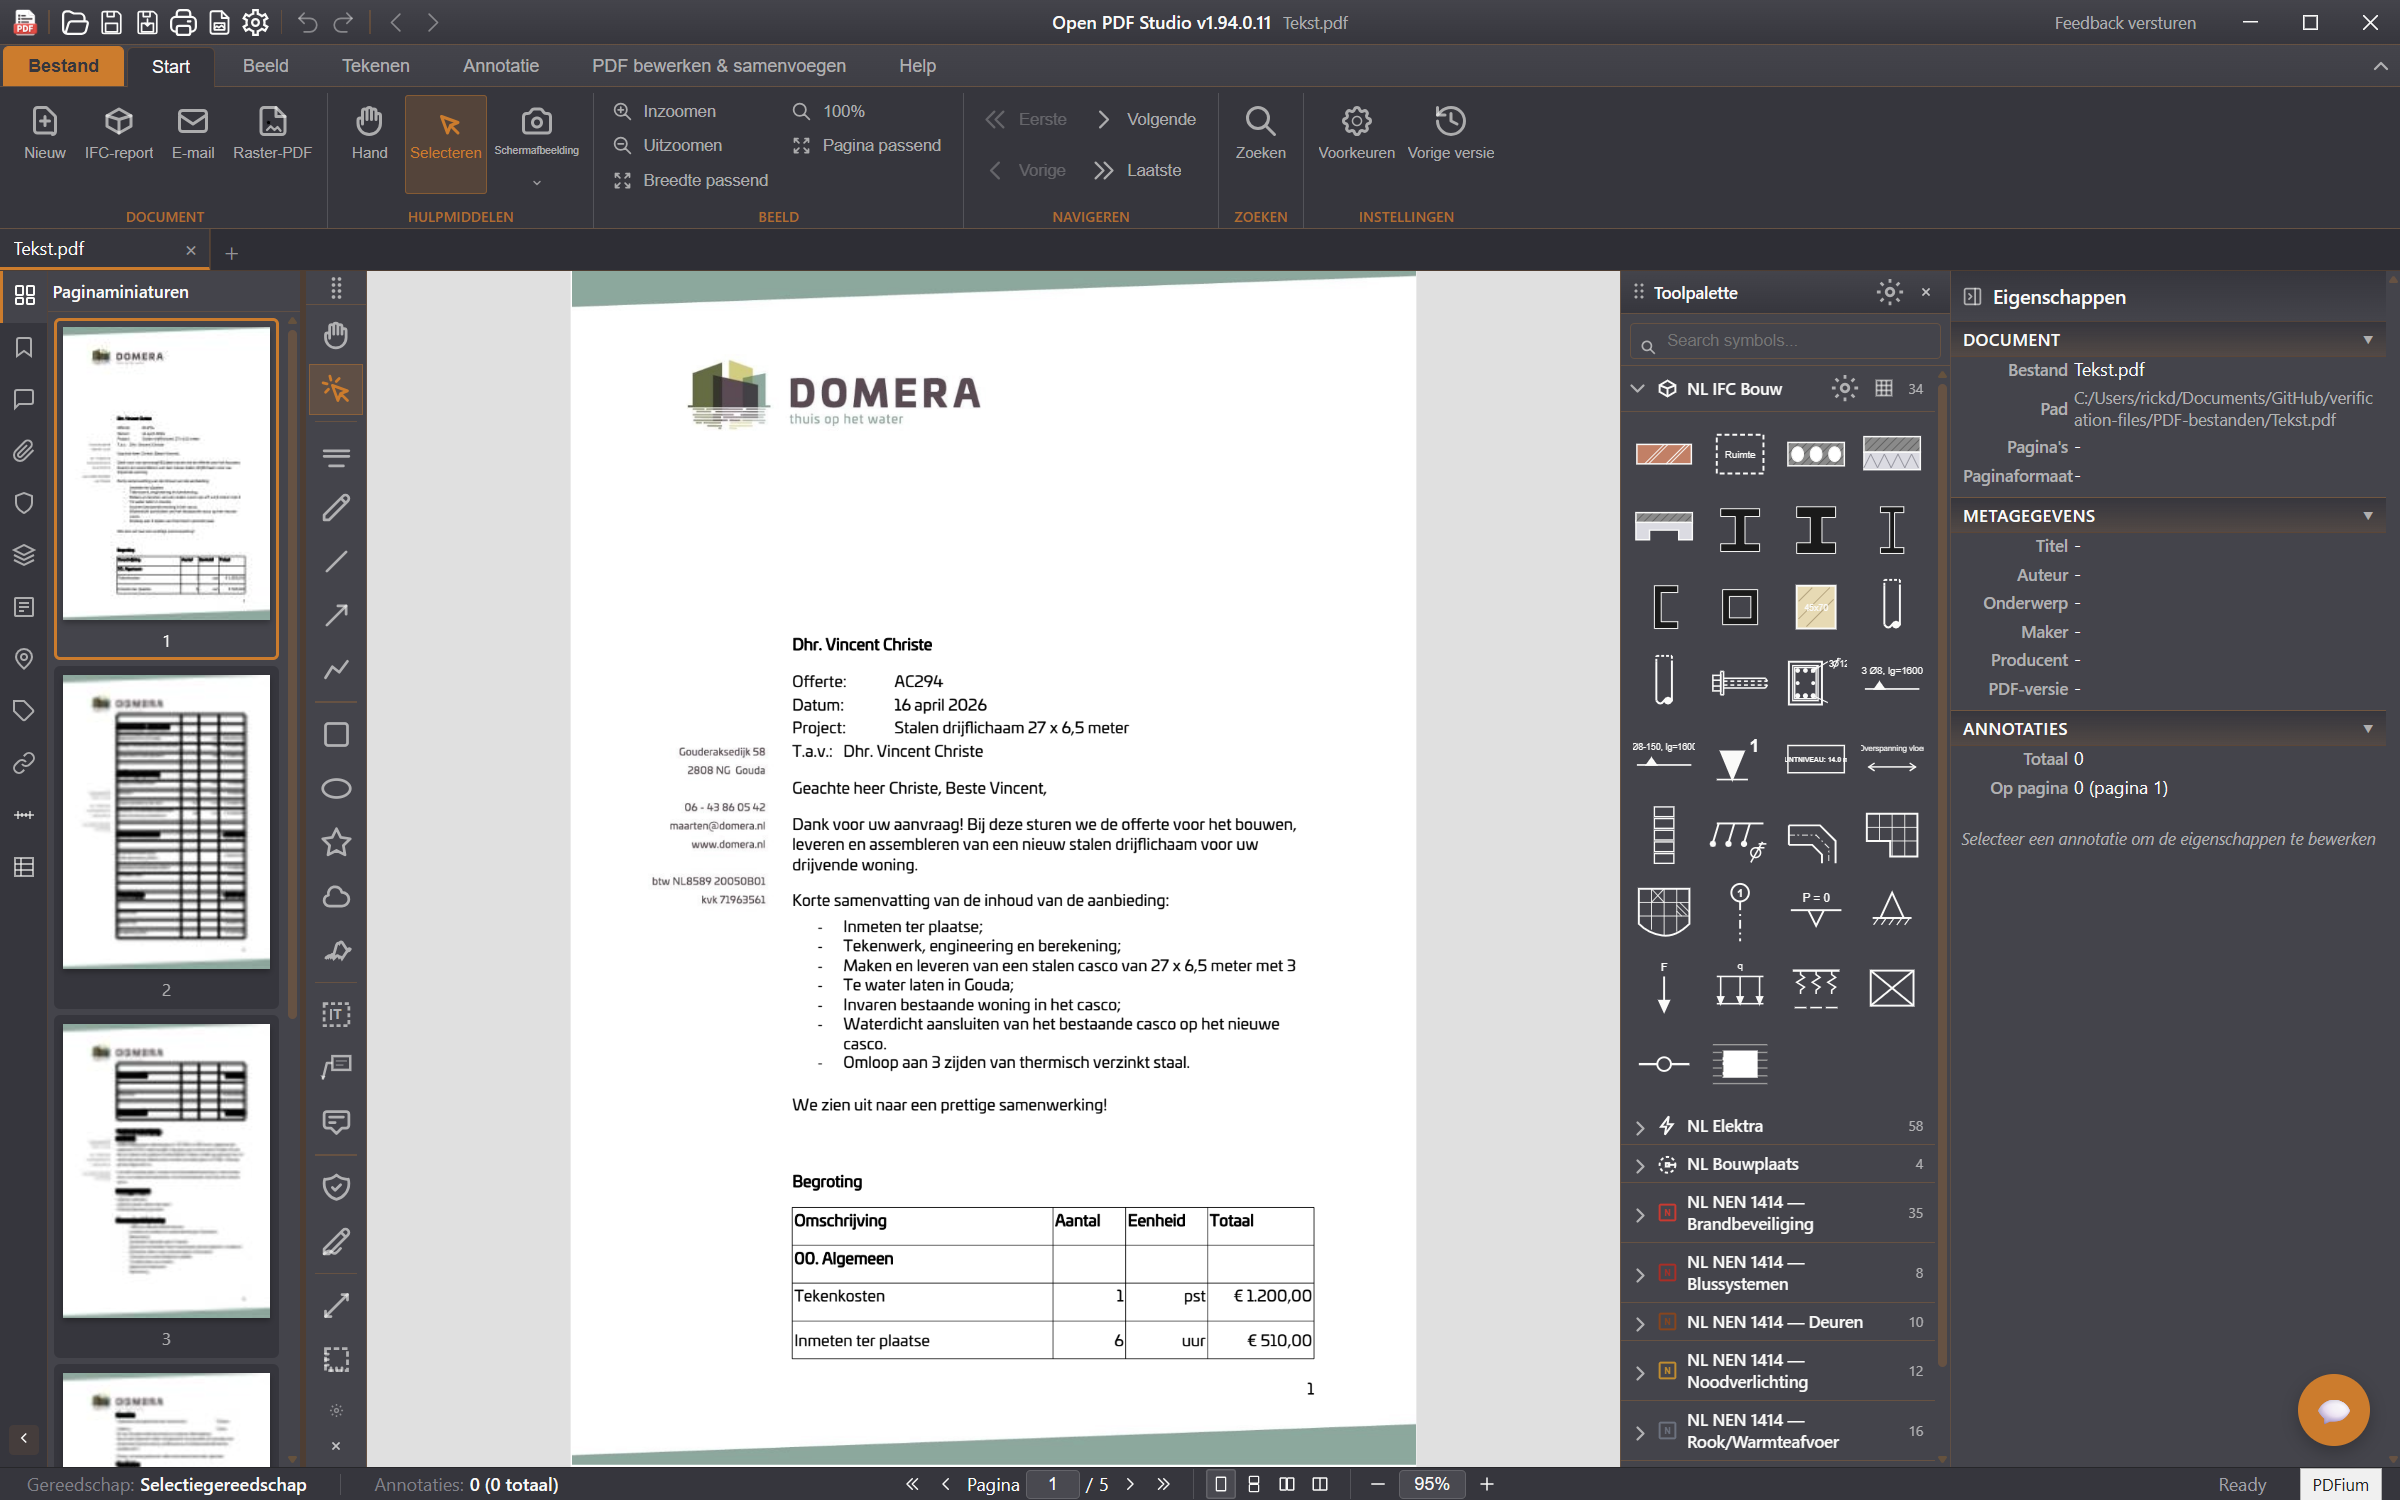
La palette d’outils (onglet Affichage → Palette d’outils) contient des bibliothèques de symboles : NL IFC Bouw, NL Elektra, NL Bouwplaats et les jeux NEN 1414 pour la sécurité incendie, la ventilation et les sprinklers.
La palette d’outils avec les bibliothèques fournies ; ouvrez un groupe et cliquez sur un symbole pour le placer.
Symboles paramétriques
De nombreux symboles sont paramétriques : après en avoir placé un, vous modifiez ses dimensions, son type ou son texte dans le panneau des propriétés et le dessin suit. Par exemple les murs, les poutres en béton, les trames, les cotes de niveau, les appuis et les charges.
En vraie grandeur
Les symboles qui ont une taille réelle — une grue avec son rayon de giration, une place de stationnement, une baraque de chantier — sont placés à la bonne taille dès que l’échelle du plan est connue.
Les angles se ferment tout seuls
Dessinez des murs ou des poutres qui se rejoignent en angle et les angles sont raccordés en onglet automatiquement. Cela vaut aussi quand les deux éléments se croisent ou s’arrêtent un peu avant : le programme trouve l’angle voulu et le termine proprement.
Trois murs dessinés séparément : les angles ont été raccordés en onglet automatiquement, y compris là où les éléments se croisaient.
Vos propres symboles
En plus des bibliothèques fournies, vous pouvez créer vos propres groupes et y ajouter des symboles SVG, ou importer un catalogue de fabricant avec des tailles commutables.
8. Modifier les pages
L’onglet Modifier & fusionner PDF sert à travailler sur le document lui-même.
Les pages peuvent être insérées, supprimées, extraites, remplacées et pivotées. Réorganisez-les en faisant glisser les miniatures dans le panneau de navigation.
Fusionner réunit plusieurs PDF en un seul document.
Filigranes et en-têtes/pieds de page avec des variables pour le numéro de page, la date et le nom du fichier.
Caviardage : marquez les zones et appliquez. Attention — l’application supprime définitivement le contenu du fichier.
Compresser réduit la taille du fichier.
9. Formulaires
Remplissez directement les formulaires PDF interactifs (AcroForms et XFA) ; les valeurs sont conservées à l’enregistrement. Vous pouvez aussi ajouter vous-même des champs : champs de texte, cases à cocher et boutons radio. Lorsqu’un document contient des champs de formulaire, le programme l’indique en haut.
10. Enregistrer, exporter et imprimer
Enregistrer
Ctrl+S enregistre dans le même fichier ; Enregistrer sous crée une copie. Les annotations sont écrites comme de vraies annotations PDF, si bien que les autres lecteurs PDF les affichent aussi.
Exporter
Exportez des pages en PNG ou JPEG de 72 à 600 dpi, ou en PDF matriciel. Échangez des annotations avec d’autres programmes via XFDF.
Imprimer
La boîte de dialogue d’impression (Ctrl+P) affiche un aperçu en direct avec la plage de pages, la mise à l’échelle et une option d’impression en tant qu’image. La tâche d’impression porte le nom du fichier PDF.
11. Raccourcis clavier
Touche
Action
Ctrl+N
Nouveau document
Ctrl+O
Ouvrir un PDF
Ctrl+S
Enregistrer
Ctrl+P
Imprimer
Ctrl+W
Fermer l’onglet
Ctrl+Z
Annuler
Ctrl+Y
Rétablir
Delete
Supprimer l’annotation sélectionnée
Ctrl+F
Rechercher
Ctrl+0 / 1 / 2
Taille réelle / ajuster à la largeur / ajuster à la page
F9 / F11 / F12
Panneau de navigation / liste des annotations / propriétés
V
Outil de sélection
1 – 5
Surlignage, main levée, ligne, rectangle, ellipse
T / N
Zone de texte / note
Esc
Terminer la série de dessin ou désélectionner
Frappes au clavier à l’écranVous enregistrez un tutoriel ? Activez Affichage → Frappes au clavier : chaque touche sur laquelle vous appuyez s’affiche en grand dans le coin inférieur droit du canevas pour que les spectateurs puissent suivre.
12. Paramètres
Dans Préférences, vous réglez la langue (39 langues, dont des langues s’écrivant de droite à gauche), le thème (sombre, clair, bleu, contraste élevé ou système), l’auteur par défaut des annotations et les valeurs par défaut des outils de dessin.
Votre travail est conservé : les onglets ouverts reviennent après un redémarrage, et vous pouvez enregistrer des espaces de travail nommés pour y revenir plus tard.
Aucune télémétrieOpen PDF Studio n’envoie aucune donnée d’utilisation. Seule la vérification des mises à jour quitte votre ordinateur ; vos documents restent où ils sont.